

Getting Started Step 2
Get Started Downloads Guides Videos File Upload
Getting Started Step 2: Initial Setup
Now that your HERO-Defender is setup it’s time to create your first real-time protection job. This video will guide you through the steps necessary to use HERO-RMM to create protection, learn about the HERO-RMM, and test a failover.
Getting Started Step 1
Get Started Downloads Guides Videos File Upload
Getting Started Step 1: Prerequisites
Before your HERO-Defender is setup, it is essential to your success that all network prerequisites be addressed and configured. This video will guide you through the steps necessary to ensure your network is ready for real-time protection.
Secure-Client Install
Get Started Downloads Guides Videos File Upload
Secure-Client Install
Note: These screenshots may be an older version, however setup is the same.
Step 1
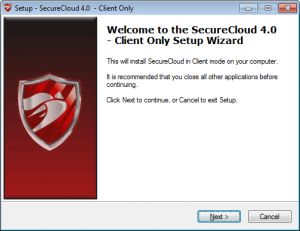
Select the install file after downloading Secure-Client_4_2_0_SP_Client_Only
Step 2
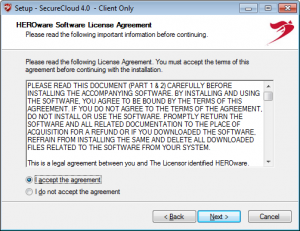
You must accept the License Agreement to continue.
Step 3
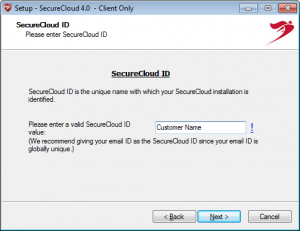
NOTE: SecureCloud ID is important! This should be unique per Defender or Client.
Example:
If your cutomer’s name is “XYZ, Inc.” always use the customer’s name in the ID. Best practices would be “Defender-XYZ” or “XYZ-Jane-Desktop” – this will help identify your backup job so it’s placed in your reseller’s account.
Step 4
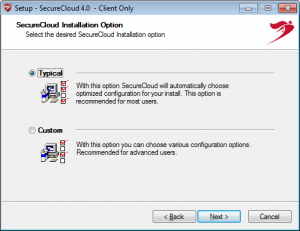
Select Typical install which will install SecureCloud as a service and take the default install location of C:\HEROware\Securecloud.
Step 5
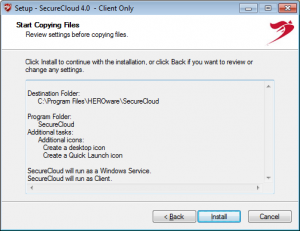
Review settings and installation location. Use the Back button to edit information.
Step 6
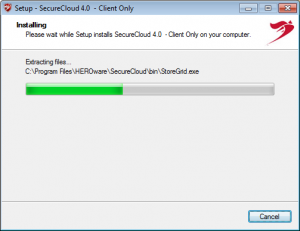
Do not interrupt installation. Installation should only take a few minutes.
Step 7
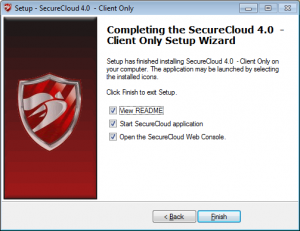
Click Finish to finalize your installation.
-

-

-

-
Latest News
-

 +1 951 223 1648