

Secure-Client Install
Get Started Downloads Guides Videos File Upload
Secure-Client Install
Note: These screenshots may be an older version, however setup is the same.
Step 1
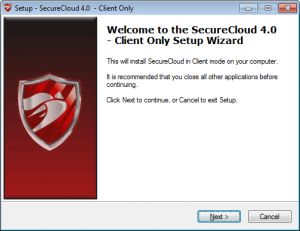
Select the install file after downloading Secure-Client_4_2_0_SP_Client_Only
Step 2
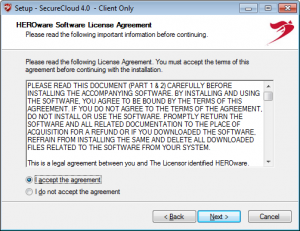
You must accept the License Agreement to continue.
Step 3
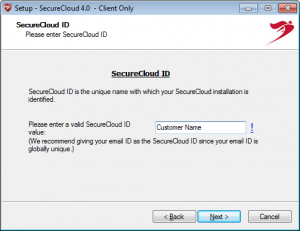
NOTE: SecureCloud ID is important! This should be unique per Defender or Client.
Example:
If your cutomer’s name is “XYZ, Inc.” always use the customer’s name in the ID. Best practices would be “Defender-XYZ” or “XYZ-Jane-Desktop” – this will help identify your backup job so it’s placed in your reseller’s account.
Step 4
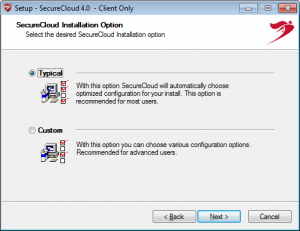
Select Typical install which will install SecureCloud as a service and take the default install location of C:\HEROware\Securecloud.
Step 5
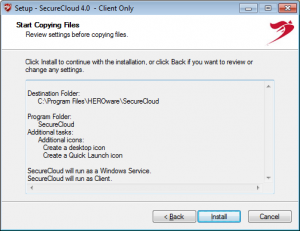
Review settings and installation location. Use the Back button to edit information.
Step 6
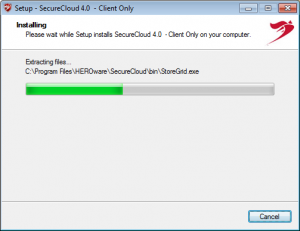
Do not interrupt installation. Installation should only take a few minutes.
Step 7
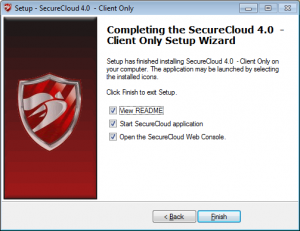
Click Finish to finalize your installation.
Secure-Cloud Getting Started and Seed Guide – Core OS
Get Started Downloads Guides Videos File Upload
Secure-Cloud Getting Started and Seed Guide – Core OS
Thank you for choosing to protect your data with HEROware’s Secure-Cloud™.
The following steps will ensure you set up your initial Secure-Cloud protection correctly and prepare you to send your “Seed” drive to HEROware.
Installation and Pre-Configuration
1.To begin, please install the Secure Cloud executable and the Firefox executable. Firefox runs natively on your HERO-Defender’s Hyper-V Core, and the Secure Cloud client runs from within the Firefox browser.
2.After the installation of both products, from the command line run c:\From the task manager click on the Services tab and confirm that both SecureCloud and SecureCloud_Webserver Services are running. If one is not, then please right click and select Start
3.Next, from the command line navigate to C:\program files (x86)\mozilla firefox\firefox.exe
4.From Firefox type in the following URL: https://localhost:6061.You may be prompted to add an exception for this security.
5.Next, log into Secure-Cloud with the standard credentials: UN: admin PW: admin. Under Settings\User Management you may create a new User. Be sure to grant full access privilege. (Your username is case sensitive)
Concept
Your HERO-Defender is creating real-time VHD’s of your production servers for high availability in minutes. With the addition of Secure-Cloud you will now have a full backup, plus incremental backups of those VHD’s are both locally on your Defender and then replicated off-site to our Secure-Cloud SAS 70 Datacenter for the ultimate Data Protection Strategy.
To create this process properly, we will ask you to create two separate Secure-Cloud backup jobs. One job will remain local and the other will be for off-site to the Secure-Cloud datacenter.
Understanding the Secure-Cloud Admin Console
Get Started Downloads Guides Videos File Upload
Understanding the Secure-Cloud Admin Console
Understanding the Reseller/Customer/Client Relationship in HEROware Secure-Cloud Admin Console
Under Reseller Admin select List of Customers
In the left pane you will see a Hierarchy Tree
The Top Level represents you, the Reseller
The Second Level represents your Customer
The Bottom Level represents a Client at your Customer
For proper administration, and to keep Customers and their Clients in their respective Hierarchy, please follow the Best Practices below:
1.In the Left Pane, click on your Top Level Reseller Name
2.In the Right Pane click on Add New Customer
3.In the Add Customer screen, fill in the details. Select the usage space for this Customer and Enable Automatically add clients and also Enable Email Reports if you want your Customer to receive their verification of back-ups. Leave all other choices in their Default Choice. Next, Click Save.
*NOTE: “Automatically add clients when they connect to the server” is Enabled but is only effective if the rules below are followed.
4.Next, decide if you want to Send or Don’t Send automated email to your Customer.
5.Notice in the Left Pane that ABC Electric has now been created as a Customer under HEROware the Reseller.
6.In the Right Pane notice that a Key Icon appears to be in the locked state, indicating that Auto Authorization has been enabled for this customer (meaning they can back-up to the Secure-Cloud under the proper Customer name as long as the below instructions are completed properly).
7.In the Upper Right Pane a Legend exists to explain the use of each Icon below.
8.In the Left Pane click on the New Customer you just created. Notice, there are No Clients available.
9.In the Right Pane click on Add New Client
10.Notice in the Top Right Pane the Navigation tells you exactly where you are.
11.In the Add New Client box, Secure-Cloud requires a unique identifier for every user. Therefore, the safest way to ensure individuality is to use the Clients email address. Or
*NOTE: Since Auto-Authorization is turned off, you must enter a password.
Also, each new account is set up as a Trial account. To switch a user over to a Permanent account follow the instruction below.
12.In the Right Pane under Client Name, the yellow highlighted Icon will switch a user from Trial to Paid.
13.Next, when installing Secure-Cloud on the Clients machine, enter the SecureCloud ID, which is the unique name you created for this Client in the Admin Panel. This will ensure that this Client’s backup always routes to the proper Customer under you, the Reseller.
-

-

-

-
Latest News
-

 +1 951 223 1648